Private or Custom Name Servers with Namecheap
In another article on this site I explain how to setup DNSSEC with BIND 9 for domain names you’re hosting. Part of the DNSSEC setup process involves publishing your domain name’s Zone Keys with your domain registrar. This process differs from registrar to registrar so since most of my domains are registered with Namecheap that’s who I’ve used as a working example in this guide.
Server names and Domain name
Throughout this article I’ll use the following values for the server names (my BIND 9 name servers) and the domain name (for which I’m going to use BIND 9 rather than Namecheap DNS):
- Server names: ns1.flodns.net & ns2.flodns.net
- Domain name: talkdns.com
These are real worked examples – the DNS for TalkDNS.com is indeed running on the two BIND 9 name servers referenced above.
Wherever you see these Server names and Domain name below you should of course replace them with your own server names and domain name.
Configuration Steps
We’ll go through the following steps in this article:
- Registering your BIND 9 name servers as valid name servers with Namecheap
- Configuring your domain in the Namecheap control panel to use your new name servers
- Validating and testing
- All done!
1. Registering your BIND 9 name servers with Namecheap
The first step is to setup our BIND 9 name servers as valid name servers with Namecheap:
- Login to the Namecheap control panel at https://www.namecheap.com
- Go to the Domain List
- Find the domain name containing your name servers (in my case: flodns.net) and select Manage
- Click on Advanced DNS
Note that we’re selecting the domain name in which our name servers are operating, not the domain name that we are hosting in BIND. So I’ve selected flodns.net since my name servers are ns1.flodns.net and ns2.flodns.net
- Scroll down to the Personal DNS Server section, select Standard Nameservers and then click on Search. Assuming you haven’t already registered any name servers with Namecheap there’ll be no results:
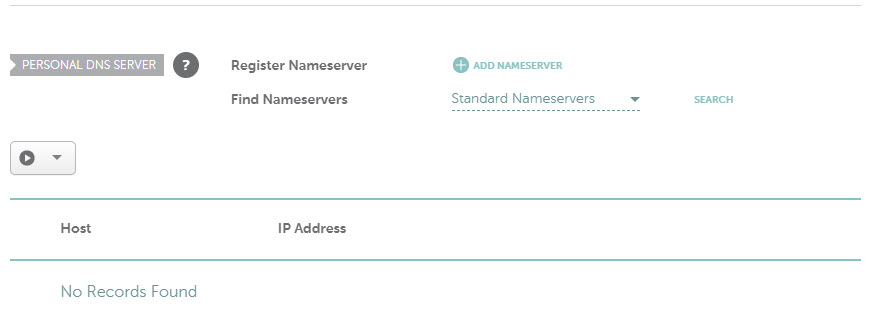
You’ll see there are two types of name servers under the Find Nameservers dropdown list: Standard Nameservers and Custom Nameservers. Standard Nameservers are those prefixed with the most common hostnames, e.g. ns1, ns2, dns1, dns2 etc. Custom Nameservers lets you choose anything you like, e.g. mydns1 or mydns2. I recommend sticking with Standard Nameservers so as to follow traditional naming convention and to make them easier to find in the Namecheap control panel at a later date.
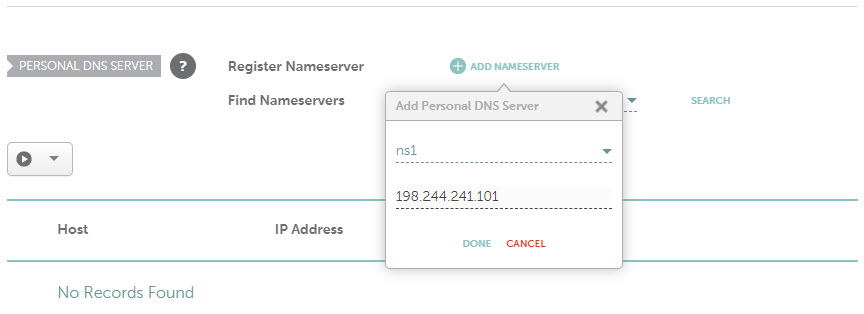
To add our two BIND 9 name servers:
- Click on Add Nameserver
- Select the hostname of our first name server from the Nameserver dropdown
- Enter the IP address of our primary name server
- Click Done
In the screenshot below you can see I’ve selected ns1 and entered the IP address of 198.244.241.101:
Repeat this for any additional name servers (e.g. ns2, ns3 etc).
Now if you click on the Search button next to Standard Nameservers you should see you name servers appear in the list of Personal DNS Servers:

2.Configuring your domain in the Namecheap control panel to use your new name servers
Now that we’ve validated our BIND 9 name servers with Namecheap we can go ahead and tell Namecheap that we want to use those name servers for some of our domain names. Before we do so we should ensure that our BIND 9 zone files are working correctly and that are name servers are publicly accessible, otherwise when they take effect our domain name will stop being accessible to the outside world. No name resolution means no domain name!
So just take a moment to double-check that you can reach your BIND 9 name servers from a different internet connection, and then run a few dig queries against it to make sure you get the results you expect:
$ dig @ns1.flodns.net www.talkdns.com +short
talkdns.com.
198.244.241.65
$
Once you’re happy that your BIND 9 servers are publicly accessible and that they are responding correctly we can go ahead and use the Namecheap control panel to set our domain name to use our new BIND 9 name servers:
- Login to the Namecheap control panel again at https://www.namecheap.com
- Go to the Domain List
- Find the domain name you want to update to use your BIND 9 name servers (in my case: talkdns.com) and select Manage
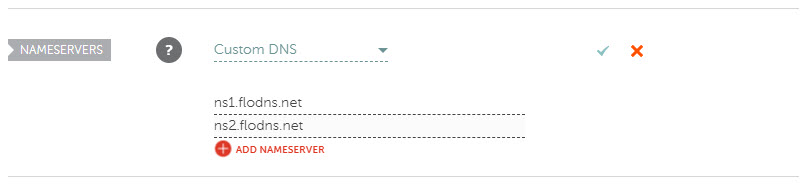
- Don’t click on Advanced DNS here, instead scroll down slightly to the Nameservers section
- Select Custom DNS from the drop-down and then type-in the fully qualified domain names or your BIND 9 name servers
- Finally click the green tick to save the changes (this is important as otherwise your changes won’t take effect!)
3. Validating and testing
Depending on the TTL of the NS records it can take up to 48 hours before the outside world will start using your new BIND 9 name servers for this domain name. You can keep an eye on this by querying an unrelated name server for the SOA and NS records for your domain name:
$ dig @9.9.9.9 www.talkdns.com SOA +short
ns1.flodns.net. support.flodns.com. 6 604800 86400 2419200 604800.
$ dig @9.9.9.9 www.talkdns.com NS +short
ns1.flodns.net.
ns2.flodns.net.
10. All done!
That’s it! You’re all done. You’ve registered your BIND 9 name servers with Namecheap and you’ve configured your first Namecheap domain name to use these name servers.